OEM Migration
Ayla's OEM Migration feature gives OEMs with OEM:Admin accounts the ability to deploy customer objects (such as Ayla Templates) from the development to the field dashboard environments.
Before You Begin the Migration
The following should be verified and understood:
- Make sure that you have associated your desired template with the target devices. This entails:
- Verifying that the correct template ID is associated with your target devices, and reviewing the template properties, schedules, notifications, and other template configurations.
Click here for the details on reviewing the template information in the Ayla Customer Dashboard.
Use the Ayla Developer Portal if you need to make changes to your template properties and other configurations. Refer to the Ayla Developer Portal User's Guide.
You can re-associate your template to the target devices in both the Ayla Developer Portal and the Ayla Customer Dashboard. Search the Ayla Developer Portal User's Guide for details on template association via the portal. Click here for details on re-associating templates in the dashboard.
- Test the template from the development dashboard environment. Templates are applied to devices in two ways:
- When the devices are first activated on the Ayla platform. This is done via the Ayla Cloud.
- When a firmware OTA update is pushed to the devices.
Therefore, after associating a new or updated template, this template does not automatically bind to the target devices until the template is applied via either of the two methods above.
We recommend that you test the template on 2-3 devices via an OTA update from the development dashboard before migrating the template to the field environment for deployment to all devices. Click here for the steps to create an OTA job.
How to Complete the Migration
|
|
Currently, OEMs can only migrate Ayla Templates for deployment, and migrations can only be done when you are logged in to the dashboard via the Google Chrome browser. |

- Log in to the Field environment for the dashboard, which is the destination for the migration.
Click here for links to the different environments available for the Ayla Customer Dashboard.
Click here for additional information on logging in to the dashboard.
- Click OEM Migration in the navigation panel. This displays the OEM Data Migration Wizard also shown in the example below:
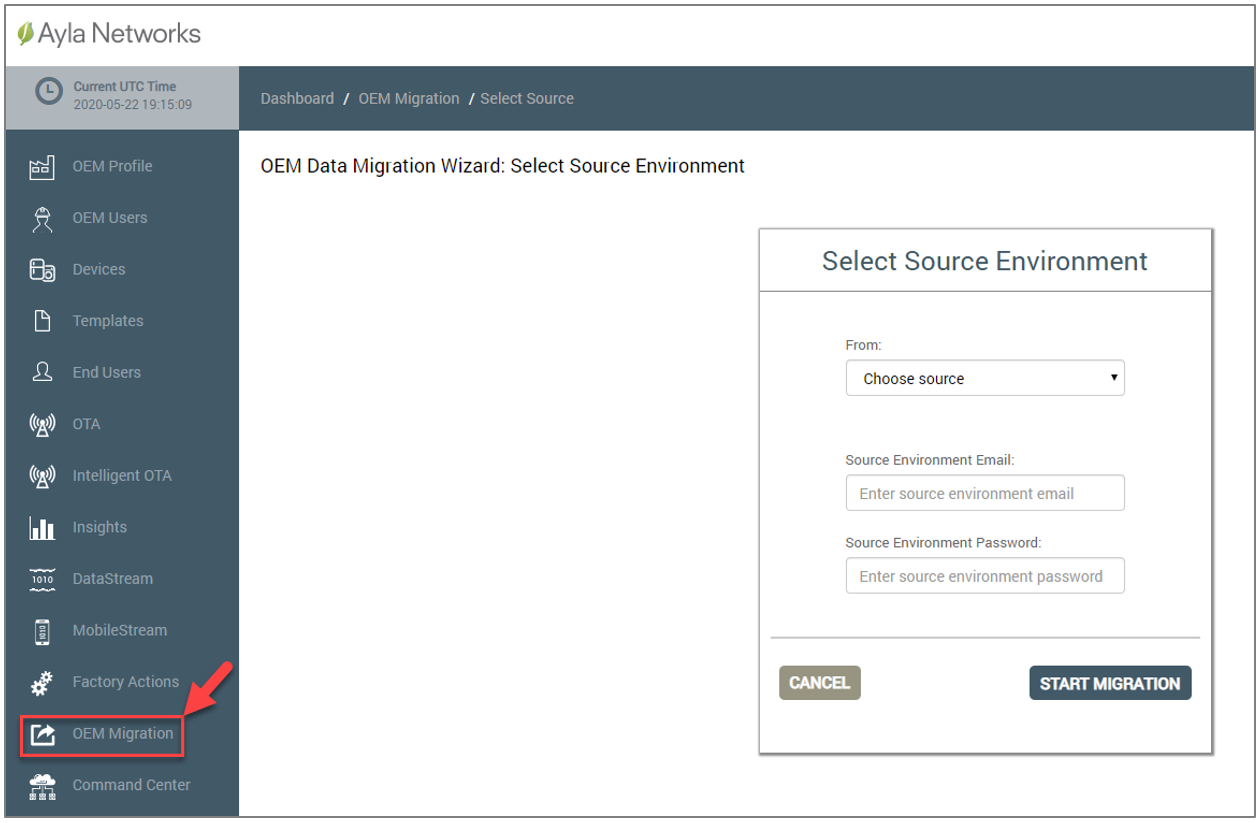
- Configure the Select Source Environment dialog box as described below:
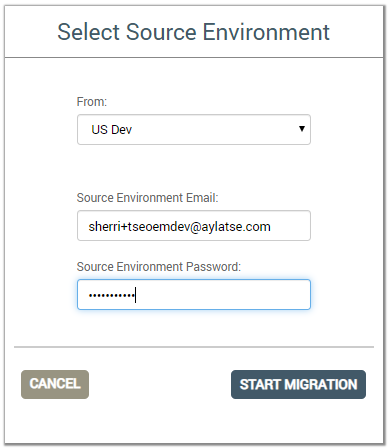
- In the From field, select the dashboard environment where the template is located (before the migration). Notice that the example above shows US Dev as the location.
- In Source Environment Email/Password fields, enter the email and password for the environment where the template is located (before the migration). Since the template (object) will be migrated from this environment, it is considered the source environment.
- Click START MIGRATION.
- In the OEM Data Migration Wizard: Select OEM dialog box, make sure that your OEM is already populated in this field. This is the OEM for the template when it is migrated to the new Field location. Refer to the following example:
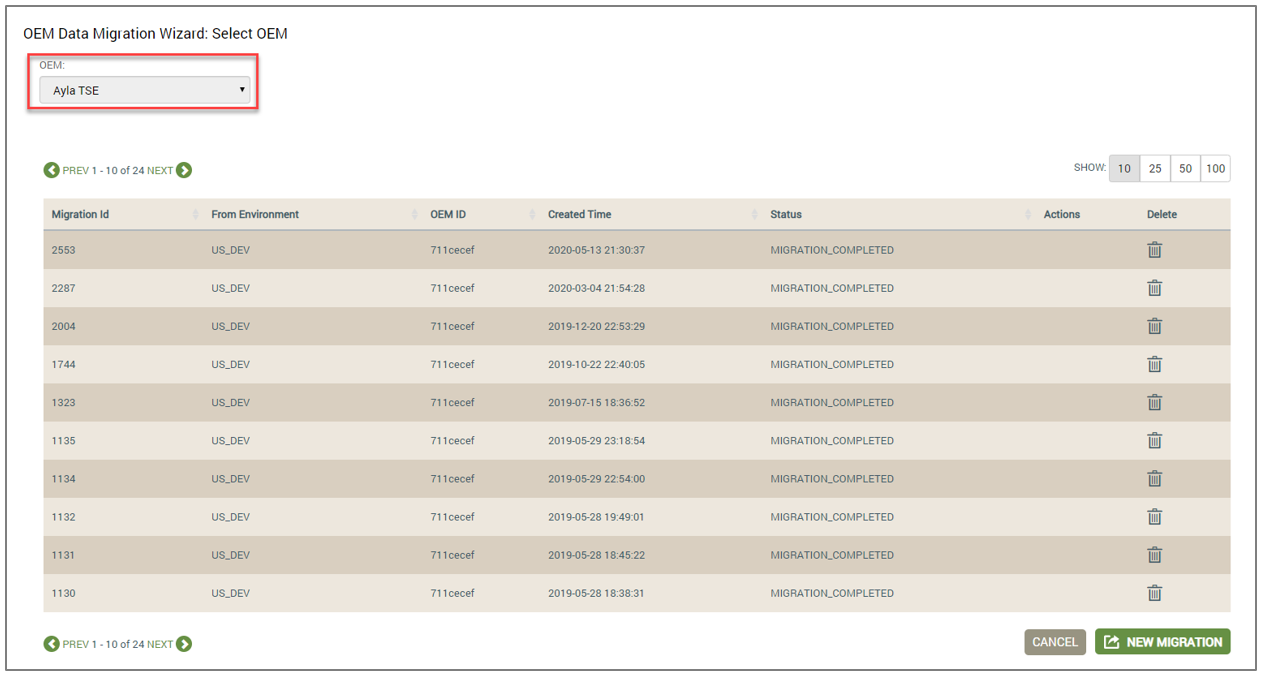
Also, in the example above, notice the table listing of migrated templates from this environment. This table listing enables you to review pertinent details on the migrated templates and delete previously migrated templates. Click here for information on how to use the table listing to review previous migrations.
- Click NEW MIGRATION, as shown below:

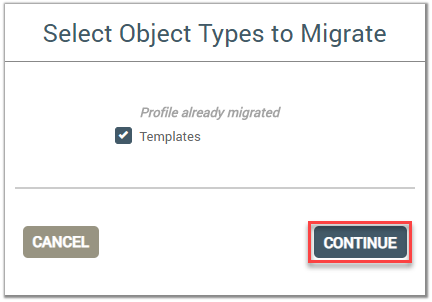
- In the Select Object Types to Migrate dialog box, select the Templates checkbox, then click CONTINUE.
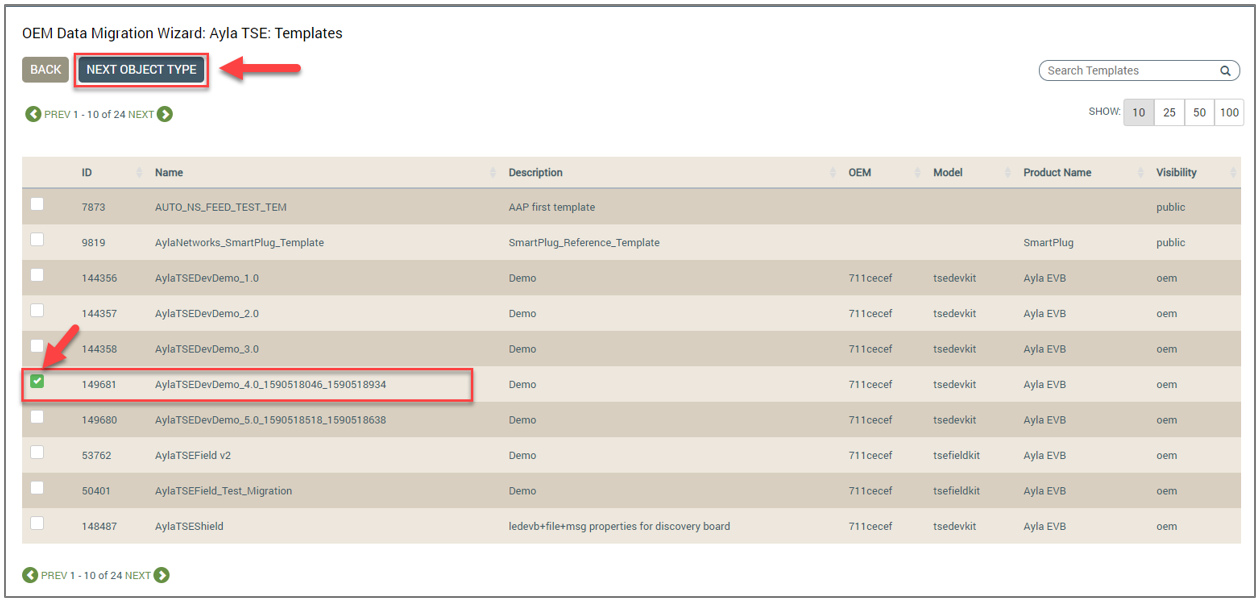
- In the next OEM Data Migration Wizard dialog box (shown below), select the check box for the template(s) you wish to migrate, then click the NEXT OBJECT TYPE button (top, left), as shown below:
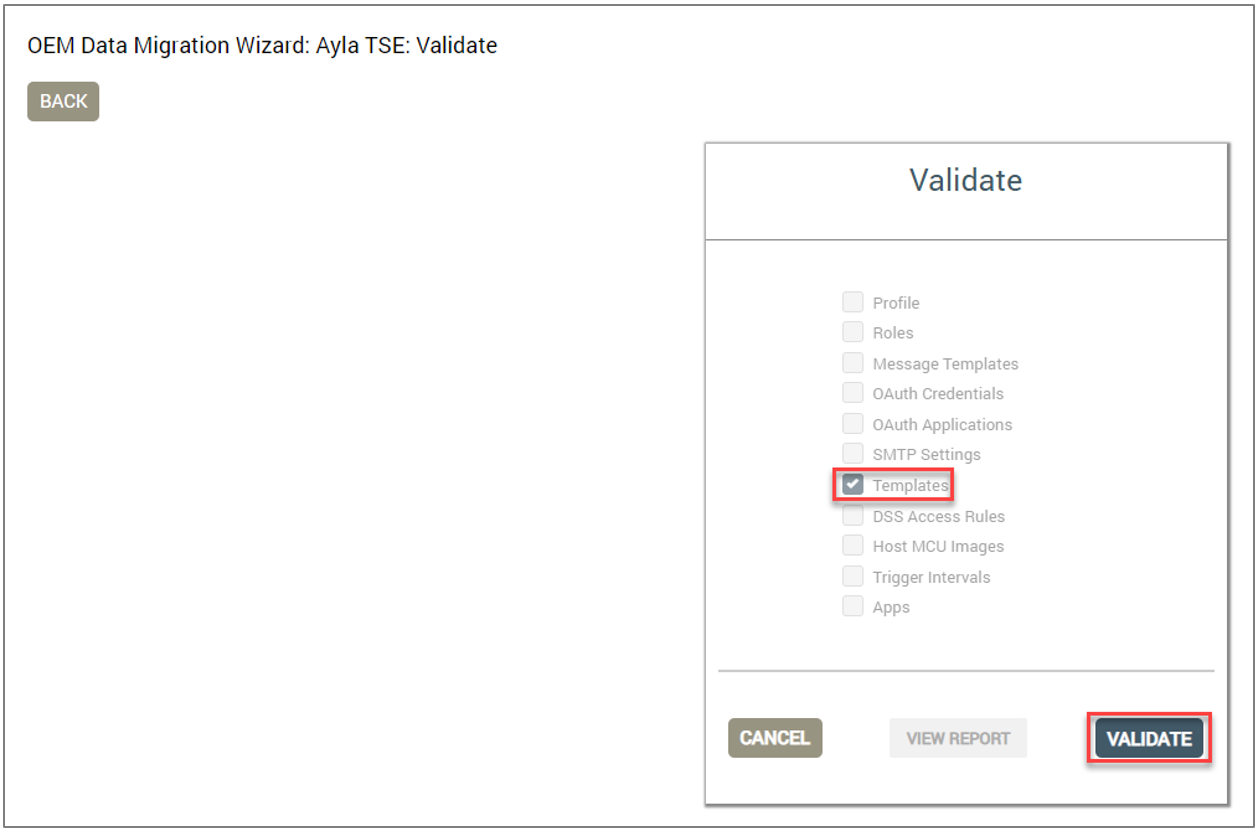
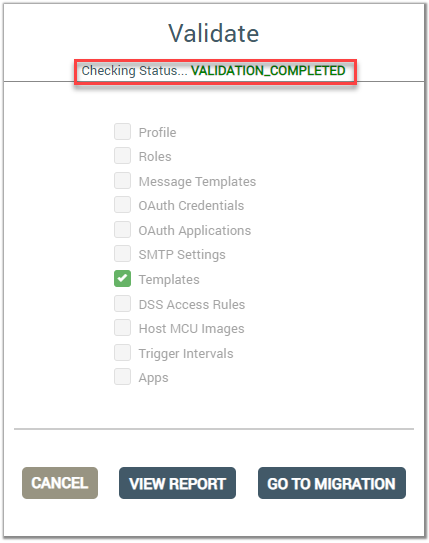
- In the Validate dialog box (shown below), make sure that the Templates check box is selected, then click the VALIDATE button.
- In the Login to Source Environment dialog box (shown below), enter the email and password for the Field dashboard environment where the template(s) will be migrated.
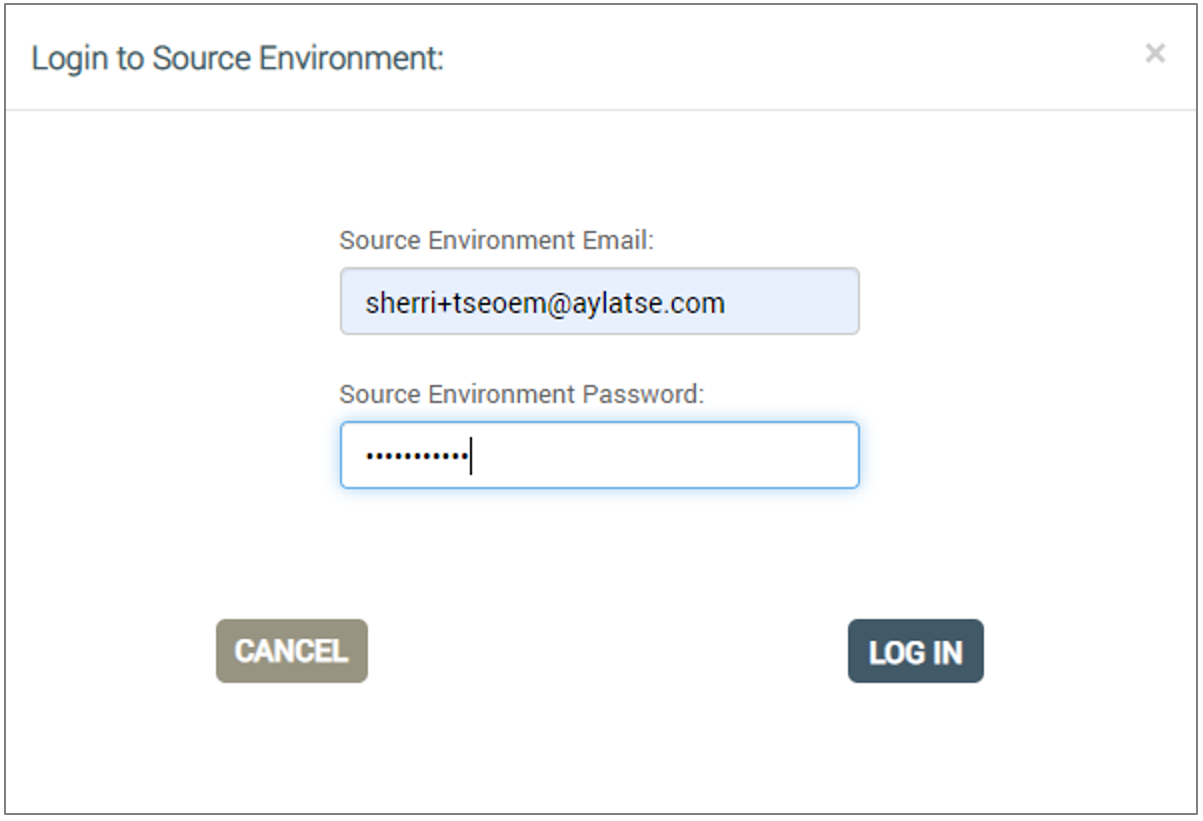
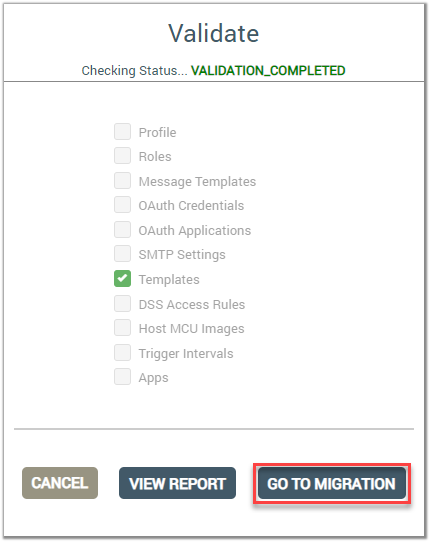
- Click the LOG IN button. This begins the validation process. When it is complete, the status message is shown at the top of the Validate dialog box, as shown below:
- Click the GO TO MIGRATION button, as shown below:
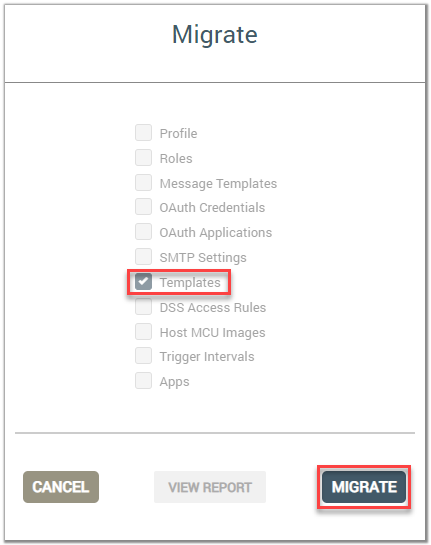
- In the Migrate dialog box (shown below), make sure that the Template check box is selected, then click the MIGRATE button.
- In the Login to Source Environment dialog box (shown below), enter the email and password for the Field dashboard environment where the template(s) will be migrated.
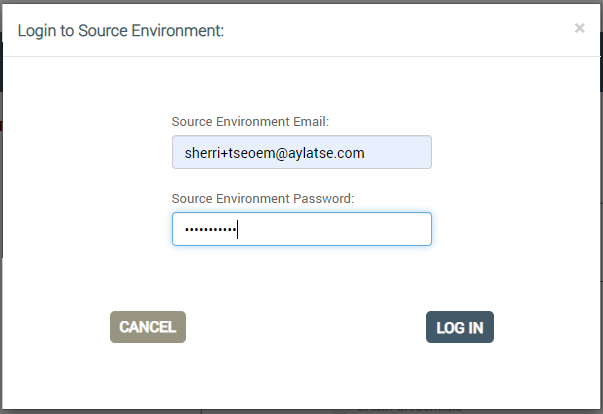
- Click the LOG IN button.
- When the status message shows, "MIGRATION_COMPLETED" in the Migrate dialog box (shown below), click the DONE button. The template should appear in the Field dashboard environment with a new template ID.
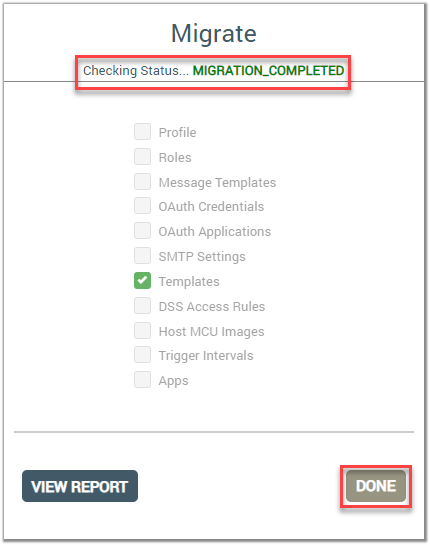
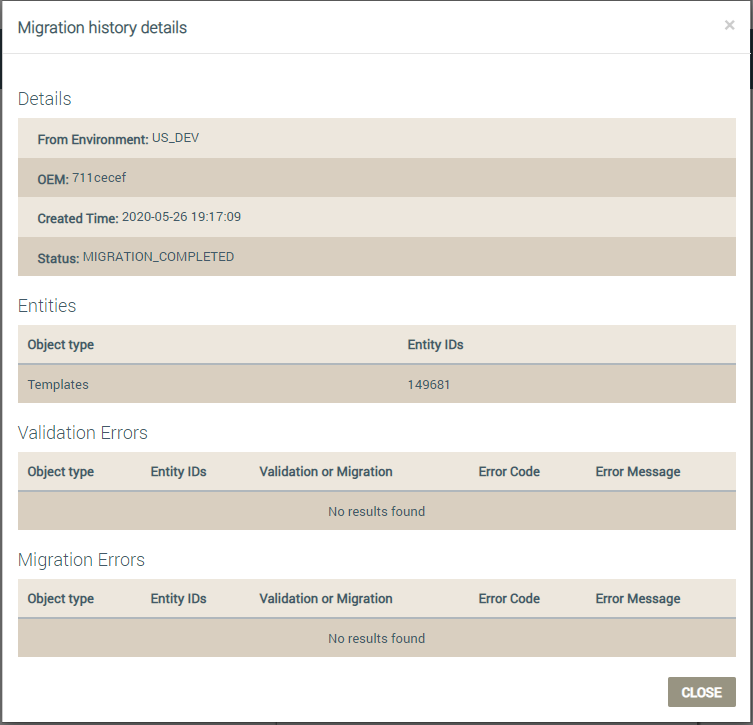
Notice also the VIEW REPORT button in the Migrate dialog box (shown above). Click this button to view the migration history on the template that you just migrated.
See also: Log In to the Ayla Customer Dashboard, Access the Ayla Customer Dashboard, Default User Roles in the Ayla Customer Dashboard, Review and Delete Previous Migrations, Potential Validation and Migration Errors (coming soon).
How to get here on the dashboard: Click OEM MIGRATION in the Navigation Panel.
Please click here to let us know how we're doing. Thank you.